Learn how to Paint Furniture

Learn how to Paint Furniture

Are you looking to transform a tired piece of furniture into a show-stopping centerpiece? Did you find a secondhand piece that just needs a little TLC? Learning how to paint furniture unlocks a world of opportunities to personalize your home for a fresh feel.

A new coat of paint is a simple and cheap fix to update a room or brighten your outdoor furniture. With the right guidance, you can tackle your next DIY paint project with confidence. 

In this guide, our Maui paint experts reveal what you need to know. You’ll learn everything from the best furniture paint colors to how to paint different types of furniture. Let’s dive in! 

What You’ll Need

Before you can start painting, you’ll want to line up your supplies. Gathering everything beforehand makes for a smooth process and professional results. For a successful furniture makeover, here’s a list of the essentials you’ll want to have on hand:

  • TSP (Trisodium Phosphate) 
  • Sandpaper or a sanding block
  • Primer (if necessary)
  • Paintbrushes or rollers (depending on your project type)
  • Drop cloths or newspapers to protect your workspace
  • Painters tape for professional-looking edges
  • Quality furniture spray paint or regular furniture paint
  • Sealant or clear wax (for chalk-painted furniture)

Painting Different Types of Furniture

Not all surfaces are created equal when painting furniture. What works on a wooden dresser might not apply to a metal chair or a laminate bookshelf. To get the best results, you’ll need to prep and paint differently depending on what you’re working with.

Here’s what to know about the most common types of furniture you can paint:
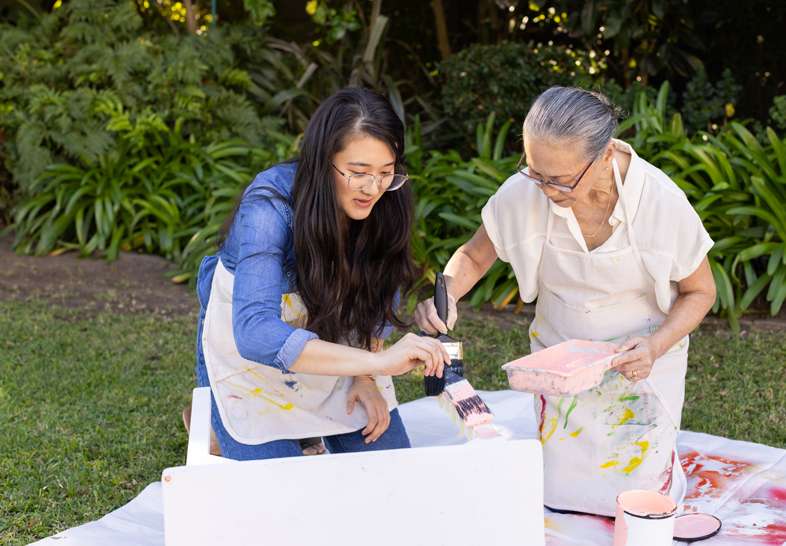
grandmother and daughter painting together
  1. Wood Furniture
    Wood is one of the easiest materials to work with when painting because of the porous material. Whether you’re starting with raw wood or a painted piece, a little sanding goes a long way. With the right paint, you can completely transform your project. Wood is a great choice for a variety of finishes, from smooth latex to rustic chalk paint.
  2. Metal Furniture
    Metal can be a bit trickier to paint, but with the right prep, you can achieve a smooth, professional finish. We tend to see metal used more frequently with outdoor furniture. It’s important to clean and prep your surfaces well to avoid rust and help your paint adhere. With quality outdoor furniture paint, your refurbished metal pieces will look fresh for years to come. 
  3. Laminate Furniture
    Laminate furniture is popular for its affordability, but can be tough to paint because of the non-porous material. With the right primer and a little patience, you can give laminate pieces a whole new look. You’ll want to be extra cautious with prep work to ensure the paint sticks and doesn’t peel later. Applying thin, even coats will help you achieve the best results.

Best Types of Furniture Paint

The type of paint you choose plays a huge role in the outcome of your project. Some paints are great for achieving a vintage look, while others offer a sleek finish. It all depends on the type of furniture you’re working with and where it will live. 

From chalk-painted furniture to durable outdoor furniture paint, there’s something for every DIY project. Here are the most common types of paint for furniture. 

  • Latex Paint: A versatile option that’s perfect for indoor furniture. It’s easy to apply, dries quickly, and comes in a wide variety of furniture paint colors. Latex is a great choice for refreshing staple pieces like dressers and tables.
  • Chalk Paint: Ideal for achieving a soft, matte finish on chalk-painted furniture. It requires little prep and is perfect for creating a vintage or distressed look. Just be sure to seal it with wax or a protective topcoat.
  • Milk Paint: This non-toxic, all-natural paint is a top choice for creating a rustic, textured look. It’s perfect for antique pieces and works well on wood furniture. With milk paint, you’ll typically need a topcoat to protect the finish.
  • Acrylic Paint: A vibrant, fast-drying option that’s great for smaller projects or detailed designs. Acrylic works well on multiple surfaces, including wood, metal, and plastic. 
  • Oil Paint: Known for its durability and glossy finish, oil paint is perfect for high-traffic furniture like cabinets. It takes longer to dry than other types, but it provides long-lasting results and a smooth, scratch-resistant finish.
  • Alkyd Paint: This is a synthetic alternative to oil paint. Alkyd is durable and weather-resistant, so it’s a popular choice for outdoor furniture paint and metal surfaces.

Step-by-Step: How to Paint Furniture

Whether you’re a first-time DIYer or a seasoned pro, we all need guidelines to keep us on the right track. Ready to transform your furniture? Here’s a step-by-step guide to walk you through the process.

Step 1: Prep Your Furniture

Use TSP mixed with warm water to remove dust, dirt, or oils that could affect the paint’s adhesion. Sand down wood surfaces to remove old finishes and create a smooth base. 

For darker wood, laminate, metal, and pieces with a shiny finish, apply a primer to help the paint adhere. This will create an even base for your paint to stick to and block any stains from bleeding through. 

sanding wood chair for painting

Step 2: Paint Your Furniture

Whether you’re using furniture spray paint for a smooth finish or applying chalk paint with a brush, take your time. Apply light, even coats with a paintbrush or roller to avoid drips, and let each layer dry completely before adding the next. Patience is key! 

If you’re aiming for a distressed look, lightly sand the edges between coats to create that worn-in charm.

Step 3: Seal the Finish

To protect your hard work, apply a sealant or wax to your finished piece. This is especially important for chalk-painted furniture, as it helps lock in the color and enhances durability. 

Prepping for an outdoor project? Use a weather-resistant sealant to protect against the elements. The last thing you want is for rain or sun damage to ruin your newly painted furniture! 

Shop Our Premium Furniture Paint Colors at Da Kine Paints

Painting your furniture is a quick, affordable, and rewarding way to give your space a makeover. You now have everything you need to give new life to a thrifted dresser or update your patio set with outdoor furniture paint.

At Da Kine Paints, your local Maui Paint Store, we offer a premium selection of Benjamin Moore paint perfect for all your projects. Ready to find the right furniture paint colors and supplies for your next DIY adventure? Stop by our store or shop our online collection today.
Using Wood Filler Before Your Paint Project

Using Wood Filler Before Your Paint Project

If you’re getting ready to dive into a new paint project involving wood, you’ve probably heard about wood filler. But what exactly is it, and why should you care? Think of wood filler as the magic ingredient that can take your wood projects from good to great. 

Whether you’re sprucing up an old dresser or tackling some exterior woodwork around the house, it’s important to know how and when to use wood filler. Luckily, our paint experts are here to help. Let’s dive in! 

Why Use Wood Filler?

Wood filler is incredibly handy for fixing up and restoring wood surfaces. It can fill in cracks, holes, and imperfections, creating a smooth and even surface ready for painting. Without this step, those minor blemishes can become glaring flaws once the paint is applied. 

Here are some reasons why you should consider using wood filler in your next project:

  • Smooths Out Imperfections: Fills in cracks, holes, and dents in wood surfaces.
  • Enhances Durability: Reinforces weak spots, making your woodwork more durable and long-lasting.
  • Boosts Appearance: Hides blemishes and defects, giving you a seamless, pro-looking finish.
  • Versatile Application: Suitable for a wide range of wood projects, from indoor furniture to decks to exterior trim.
  • Easy to Use: Simple to apply and sand, making it a great option for both beginners and seasoned DIYers.

How to Use It

Now, let’s get to the nitty gritty. You know you’re going to use filler in your next project, and you want to make sure you do it right! Here’s what to do.

Preparing Your Surface 

Before you slap on the filler, make sure your wood surface is prepped right. Start by cleaning the wood to remove any dirt, dust, or loose debris. For larger holes or cracks, use a putty knife to remove any loose wood or old filler. Sand the area lightly to create a smooth surface for your filler to adhere to. 

Do you need to strip paint off wood as part of the prep process? Check out our guide on how to do this. 

Applying Wood Filler

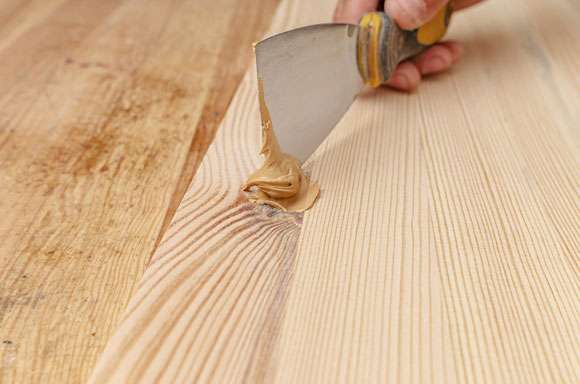
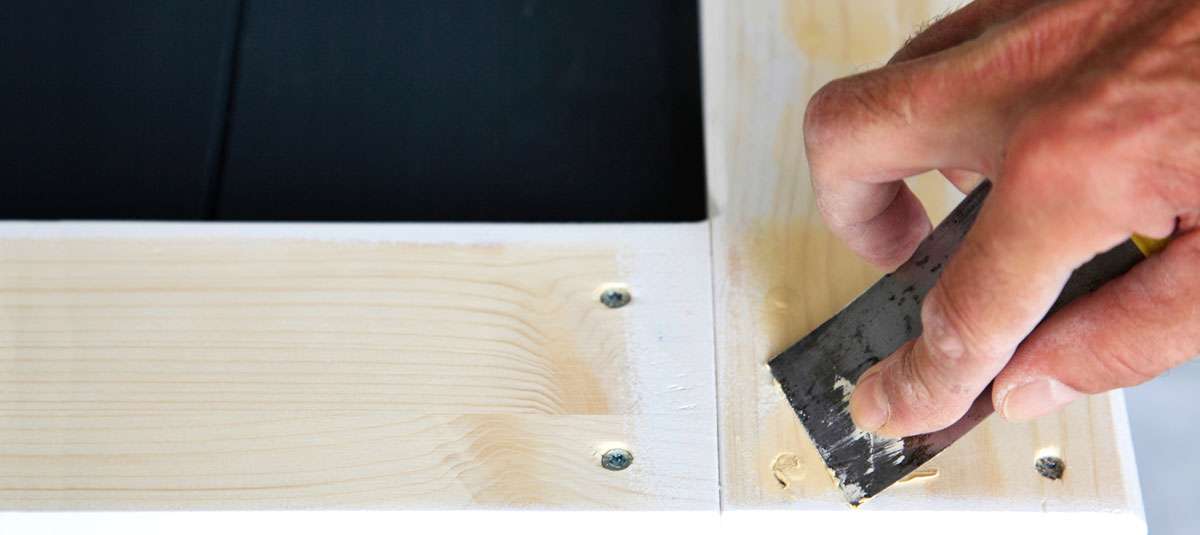
Once you’ve prepped your surface, it’s time to apply the filler. Using a putty knife or a similar tool, press the filler into the crack or hole. Be sure to overfill slightly, as wood filler tends to shrink as it dries. 

After it dries, sand the area again until it’s smooth and flush with the surrounding wood. Now, your wood surface is ready for priming and painting.

Comparing Wood Filler Types

Not sure which type of filler is right for you? With so many options on the market, it can be a little confusing. Let’s compare the three main types to help you decide which is best for your project: 

Wood Filler Caulk

This is perfect for filling gaps and cracks where you need flexibility. It’s great for outdoor wood projects since it can expand and contract with the weather. This makes it ideal for outdoor applications, such as deck wood filler or exterior wood filler work.

The application is straightforward – it comes in a tube and is applied with a caulking gun. Once you’ve applied it, smooth it out with a putty knife and allow it to dry before painting.

Wood Filler Putty

This option is thicker and more malleable than caulk, and is great for filling deeper holes and larger cracks. Putty is often used for interior wood projects, like furniture repairs or indoor trim work. 

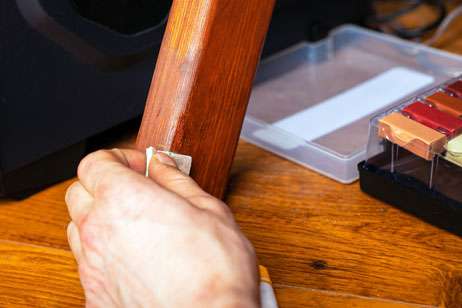
It’s easy to work with and can be shaped and molded to fit the area you’re working on. Simply knead the putty until it’s soft, press it into the hole, and smooth it out. Once it hardens, you can sand and paint over it. 

Liquid Wood Filler

Liquid filler is a thinner, more fluid option that’s ideal for filling fine cracks and small holes. It gets into cracks better than putty or caulk, making for an easy fix in those hard-to-reach areas.

This type is especially good for detailed woodwork where you need to be precise. Apply it with a brush or a small applicator, allow it to dry, and then sand it smooth. Liquid filler is versatile and works well for both interior and exterior wood projects.

Tips for Using Wood Filler

Feeling nervous about your latest DIY project? We know wou want that piece of furniture or deck to look like it was done by a pro, not like it was your first rodeo. Using wood filler might seem tricky at first, but you’ll get the hang of it in no time with these tips.

  • Choose the Right Filler: Match the filler type to the specific needs of your project. For instance, liquid filler is a great choice for intricate projects that require a deeper level of precision.
  • Work in Layers: For deeper holes, apply the filler in layers, allowing each layer to dry before adding the next. This helps prevent cracking and ensures a solid repair.
  • Sand Smooth: Sanding is crucial for achieving a clean finish. Start with a coarser grit and finish with a finer grit to make sure your surface is smooth and ready for paint.
  • Prime Before Painting: After sanding, throw on a primer to make sure the paint sticks well to the filled spots. This will also help you get a uniform color and finish in your final product.
  • Be Patient: Allow the wood filler to dry completely before sanding and painting. Rushing the process can lead to a less-than-perfect finish.
  • Keep It Clean: Clean your tools immediately after use to prevent the filler from hardening on them. A clean tool makes for a smoother application next time.
  • Practice Makes Perfect: If you’re new to using wood filler, practice on a scrap piece of wood first to get a feel for how it applies and dries.

Start Your Next Paint Project at Da Kine Paints in Maui 

Whether you’re tackling an exterior wood filler project or fixing up an indoor piece, the right filler can make all the difference. Now that you have a better understanding of how to use fillers, you can achieve polished, professional results.

So, the next time you embark on a wood project, remember the importance of filler! 

Looking for quality products and expert advice? Visit Da Kine Paints for all your paint needs or shop our expansive online collection. Our friendly and knowledgeable staff are here to help you find the perfect paint products to make your project shine. 

How to Strip Paint: A Complete Guide

How to Strip Paint: A Complete Guide

Wondering how to strip paint? Whether you’re tackling a renovation project or prepping for a fresh new look, it can seem like a tough task. However, there is no need for that. The process of removing old paint layers can vary depending on the surface and the type of paint involved. Luckily, our paint experts are here to walk you through what to do.

In this guide, we’ll share the best methods for stripping paint from metal, concrete, and wood surfaces. By the time you’ve finished reading, you’ll be ready to say goodbye to that old, cracked paint. 

The Best Ways to Strip Paint

Using the right method is the key to success, whether you’re revamping an old dresser, prepping your walls for a makeover, or restoring a backyard deck. Stripping paint can be messy and time-consuming, but with the right knowledge, you’ll have smooth paint surfaces in no time. 

Here are the best ways to get the job done:

stripping paint off of door with a heat gun
  • Paint Stripper – Chemical paint strippers are solvents that break down the paint’s bond with the surface. They’re effective on wood, metal, and concrete and come in gel or liquid forms. Apply the stripper, wait for it to react with the paint, and then scrape off the loosened paint.
  • Sandpaper – This manual method is best for smaller areas or intricate details. It’s particularly effective on wood surfaces. Start with coarse grit to remove the bulk of the paint and finish with a finer grit for a smooth surface.
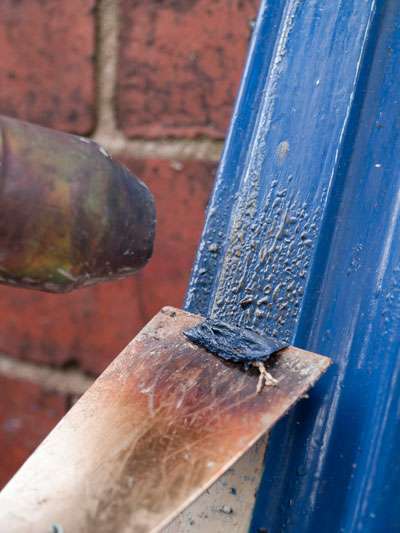
  • Heat Gun – A heat gun softens the paint, making it easier to scrape off. This method is quick and effective on large surfaces but requires caution to avoid damaging the underlying material or causing fires.
  • Infrared Devices – Infrared paint removers use infrared rays to heat the paint without damaging the wood underneath. They’re effective and safer than traditional heat guns.
  • Steam Stripper – Steam strippers use hot steam to soften paint. This method is environmentally friendly and works well on wood and other delicate surfaces.

Stripping Paint from Walls

Stripping paint from walls can be a labor-intensive process but is necessary for achieving a smooth finish with your new paint. Here’s how to do it: 

  • Preparation – Start by removing any of your furniture, fixtures, and wall hangings. Cover floors and immovable objects with drop cloths.
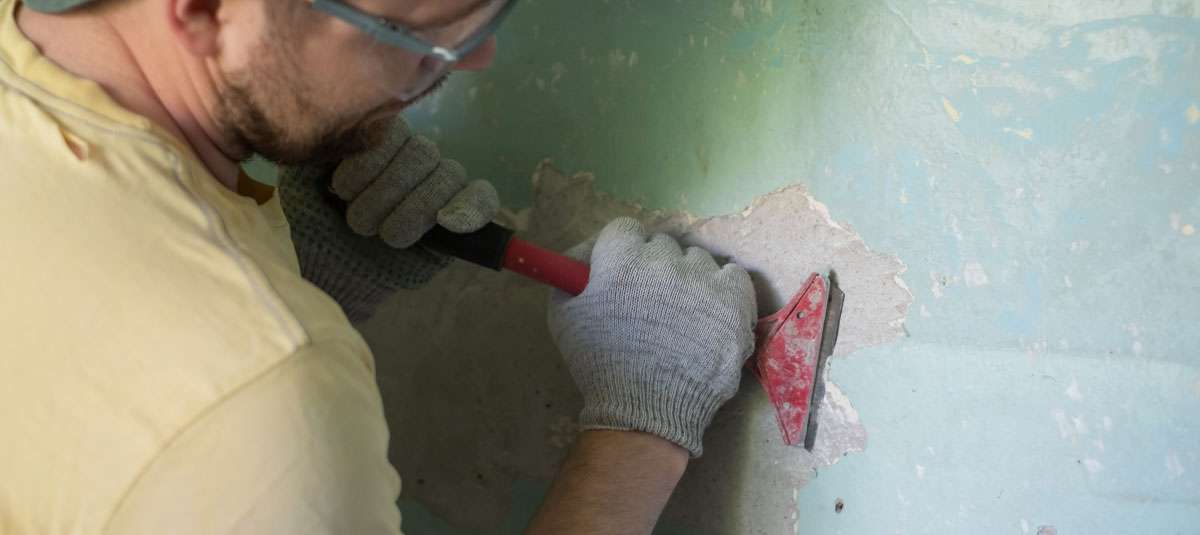
  • Choosing a Method – For walls, chemical paint strippers or heat guns are often the most effective. Apply the stripper or use the heat gun to soften the paint, then scrape it off with a putty knife or paint scraper.
  • Safety – If your walls have layers of old paint, especially if your house was built before 1978, there might be lead paint involved. Use a lead test kit to check. If you find lead, take appropriate safety measures when stripping lead paint or consult a professional.

Stripping Paint from Wood Surfaces

Planning to remove paint from wood? Wood surfaces require a little more care to avoid damage. Here’s the best approach:

Stripping paint off wood
  • Preparation – Similar to walls, start by protecting the surrounding area. Ensure good ventilation and wear protective gear.
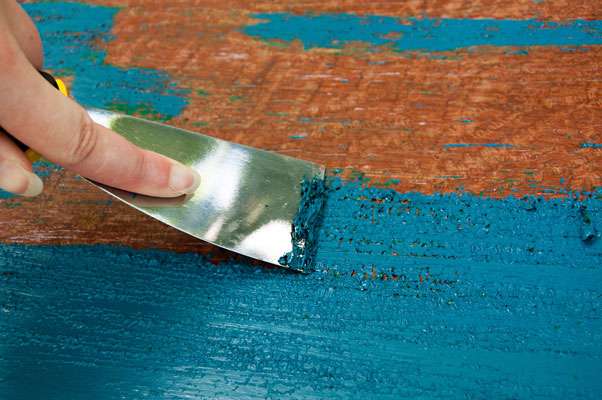
  • Choosing a Method – Sandpaper and chemical strippers are best for wood. For detailed woodwork, a chemical stripper is best for getting into grooves and crevices. Apply the stripper, let it sit, and scrape off the paint. Use fine-grit sandpaper for a smooth, seamless finish.
  • Finishing Touches – Once the paint is removed, clean the wood with a damp cloth and let it dry before refinishing.

Stripping Paint from Concrete

If you’re going to strip paint from concrete as part of a home renovation, it’s important to know that concrete surfaces like patios and garage floors painting often require a different method:

  • Preparation – Clear the area and protect anything you don’t want to get paint stripper on.
  • Choosing a Method – Chemical strippers designed for masonry work best on concrete. Apply the stripper generously, wait as long as the instructions advise, and then use a stiff brush or scraper to strip paint from concrete.
  • Cleaning – Wash the concrete with water and a detergent to remove any residue from the stripper.

Stripping Paint From Metal

Stripping paint off metal surfaces can breathe new life into your railings, furniture, and doors. However, you’ll need to take special care to strip paint off metal without damaging the material underneath. Here’s how to get started:

  1. Preparation: As with any paint-stripping project, start by preparing your workspace. Move any furniture or items away from the area and cover the floor with drop cloths to catch any paint chips or debris. Make sure you’re in a well-ventilated area, especially if you plan to strip paint off metal using chemical strippers that can release fumes.
  2. Choosing a Method: The best method to strip paint off metal is typically using a chemical paint stripper. Apply a fair amount of the stripper to your metal surface using a brush or a sprayer, following the manufacturer’s instructions.
  3. Wait and Scrape: After applying your paint stripper, allow it to sit for the recommended time. The paint should start bubbling and lift away from the metal. Once that happens, use a putty knife or a paint scraper to remove the loosened paint.

How to Prepare the House for Stripping

Before you jump into stripping paint, it’s important to set the stage right. Think of it like getting ready for a big event—preparation is key! Make sure your space is ready to handle the mess and the fumes to keep everything safe. Here’s how to get your house prepped for paint stripping. 

Preparing for paint removal project
  1. Clear the Area
    Start by removing all furniture, decorations, and other items from the room or area where you’ll be working. This not only protects your belongings but also gives you plenty of space to move around without obstacles.
  2. Protect Surfaces
    Use drop cloths or plastic sheeting to cover your floors, windows, and any immovable objects. Tape the edges so they stay in place and provide full coverage while you work.
  3. Ventilation is Crucial
    Stripping paint can release fumes and dust, which can be harmful if you inhale them. Maintain good ventilation by opening windows and doors. If possible, set up fans to help circulate fresh air and move the fumes outside.
  4. Use Safety Gear
    Safety is crucial when stripping paint. Wear protective gloves to prevent skin contact with chemical strippers. Safety goggles will protect your eyes from splashes and dust. Consider also getting a mask or respirator to avoid inhaling fumes and particles.
  5. Contain the Mess
    Stripping paint can be a messy job. Have a trash bag or bucket nearby to collect paint chips and debris as you work. This will help keep your workspace tidy and make cleanup easier.

Stripping Paint FAQ

Do I need to strip old paint before repainting?

It depends on the condition of the old paint. If it’s peeling, flaking, or bubbling, it’s best to strip it off for a smooth surface. If the old paint is in good condition, you might just need a light sanding to create a good bonding surface for the new paint.

What is the best way to strip paint from wood?

The best way to strip paint from wood is using a chemical paint stripper followed by sanding. This combination ensures that all paint, especially from crevices and detailed areas, is removed without damaging the wood.

How do you clean up a paint stripping job?

After stripping paint, clean the surface with a damp cloth to remove any residue. For chemical strippers, follow up with a recommended neutralizer. Dispose of paint chips and stripper waste properly, following local regulations.

Shop Our Benjamin Moore Paints in Maui

Stripping paint can be tricky, but you can achieve a beautifully smooth surface ready for fresh paint on your own. Whether you’re dealing with wood, concrete, or walls, our comprehensive guide has you covered. 

Ready to start your next painting project? Shop our premium paint selection at Da Kine Paints and find everything you need to transform your space.

Explore Benjamin Moore Color Trends 2025

Explore Benjamin Moore Color Trends 2025

Each year, designers and homeowners alike anxiously wait for Benjamin Moore’s latest Color of the Year. This choice influences everything from home décor trends to furniture selections for the year ahead. Finally, the Color Trends of 2025 are here!

For 2025, Benjamin Moore has chosen Cinnamon Slate 2113-40. It’s subtle yet rich, and they describe it as “enduring style meets modern sensibility.” It’s warm, comforting, and bound to dominate the home design scene. 

What does the Color of the Year and Color Trends 2025 Palette mean for your home? How can you make the most of these cozy colors in your next paint project? Here’s everything you need to know about the full lineup.

Cinnamon Slate: The 2025 Color of the Year

Let’s talk about the star of the 2025 color palette, Cinnamon Slate. This shade brings together heathered plum and velvety brown to create a color that feels both familiar and fresh. It’s perfect for spaces where you want to add warmth without overwhelming the room. 

Cinnamon Slate creates an inviting and grounding atmosphere. We love it in areas where you want to feel at ease—like a living room or home office. It’s also incredibly versatile. You can pair it with lighter neutrals or go bold with darker accent colors.

The Color Trends 2025 Palette

Of course, Benjamin Moore never stops at just one color. They’ve curated a stunning lineup of shades that flow seamlessly from one room to the next. Each color has its own personality, but together they create a cohesive vibe throughout the home. Here’s a breakdown of the Color Trends 2025 Palette and where these colors can truly shine. 

Sea Salt

Sea Salt (CSP-95) is a light, neutral shade that creates an airy, open feel in any space. Perfect for hallways, staircases, or entryways, this soft tone brings a clean and calming vibe to your home. You can pair deeper shades with Sea Salt to enhance the natural flow between rooms and create a solid foundation.

Leather Saddle Brown

Leather Saddle Brown (2100-20) is a rich, earthy tone that adds warmth and depth to rooms. It’s great for creating a grounded atmosphere in rooms like a living room or study. You can use it to bring stability and comfort into cozy spaces. This hue pairs beautifully with lighter accents like Sea Salt for a balanced contrast.

Chowning’s Tan

Chowning’s Tan (CW-195) is a versatile, adaptable tan shade that works well as a backdrop or a stand-alone neutral. Its soft warmth makes it ideal for living rooms, bedrooms, or any space where you want a subtle touch of coziness. Pair it with bolder pops of color for striking accents or let it shine on its own for a more understated yet refined look.

Tissue Pink

Tissue Pink (1163) is a warm, inviting hue that adds a playful touch to any space. It’s a great pink for spaces like entryways, where you want to greet guests with a welcoming feel. Use it to infuse a sense of fun and charm into smaller spaces or as an accent color in larger areas.

Stained Glass

Stained Glass (CSP-685) is a rich teal-like shade that makes a bold statement. Ideal for bathrooms or as an accent wall, this color adds depth and sophistication without swallowing the room. You can pair it with neutral tones like Glacier White for a striking, elegant balance.

Ashwood Moss

Ashwood Moss (1484) is a deep, earthy green that brings a natural, organic vibe to any room. Use this shade to create a cozy, grounded atmosphere in spaces like kitchens or dining rooms. Its darker tone adds depth and sophistication, so it’s also an excellent choice for accent walls and cabinetry.

Rosepine

Rosepine (461) is the lighter, softer counterpart to Ashwood Moss. This gentle green brings light and airiness to your space, balancing out the deeper tones of its complement. Rosepine works beautifully in kitchens, dining rooms, or bedrooms where you want to create a serene atmosphere. Pair it with Ashwood Moss for a nature-inspired look that feels warm and refreshing.

Paris Rain

Paris Rain (1501) is a soft, moody hue that evokes a sense of quiet elegance. This color brings up feelings of calm and clarity, so it’s great for bedrooms and home offices. Really, it’s perfect for any space where you want to unwind or get creative.

Glacier White

Glacier White (OC-37) is the go-to choice for lovers of crisp, clean spaces. This timeless white is perfect for creating fresh bedrooms or bright, open living areas. Pair it with bolder shades like Stained Glass for a modern twist, or use it as a foundation for an all-white, minimalist look.

Color Trends for 2025: What to Expect

So, what can we expect to see in 2025 when it comes to home design? The 2025 palette is all about warmth, comfort, and timeless style. Earthy tones like Cinnamon Slate and Leather Saddle Brown are back and bigger than ever, adding coziness and depth to any room. 

But don’t worry—light, neutral shades like Sea Salt and Glacier White are still trending for giving spaces that fresh, open feel. Nature-inspired greens like Ashwood Moss and Rosepine are also having a moment. These shades help us bring a bit of the outdoors inside. These shades are great for creating calming, natural spaces that feel relaxed and welcoming.

One fun trend to watch? Layering colors! The 2025 palette is designed to work together, so don’t be afraid to mix and match shades for depth and dimension. This year’s Benjamin Moore color trends make spaces feel inviting, lived-in, and effortlessly stylish.

Shop Benjamin Moore Color Trends of 2025 at Da Kine Paints

At Da Kine Paints, we’re thrilled to offer Benjamin Moore’s Color of the Year 2025 and the entire Color Trends 2025 Palette. Whether you’re livening up a room or planning a full home makeover, we have the perfect colors for your project. 
As Maui’s premier Benjamin Moore retailer, Da Kine Paints is your go-to spot for all things paint. Stop by our store to check out our full selection of Benjamin Moore colors or chat with one of our paint experts. Let’s make your home feel just right—one beautiful color at a time!

A Painting Vaulted Ceilings How To

A Painting Vaulted Ceilings How To

Many homeowners spend weeks deciding what color to paint their walls, often neglecting the ceiling color. While there’s nothing wrong with leaving your ceilings white, painting vaulted ceilings with some color can make a huge difference in your home’s aesthetic.

Whether you’re looking to make a small room seem larger, help a massive room feel cozier, or simply want to add character to your space; taking the time to paint your ceilings can help you achieve your home design goals. 

If you’re concerned that painting vaulted ceilings on your own seems daunting, you’re not alone. Luckily, all you need is a little guidance before getting started. In this guide, we’ll explore how to paint vaulted ceilings like a pro so you can transform your home.

Preparing Your Vaulted Ceiling

Preparation is essential — here’s how to get ready for the project ahead.

  1. Safety First
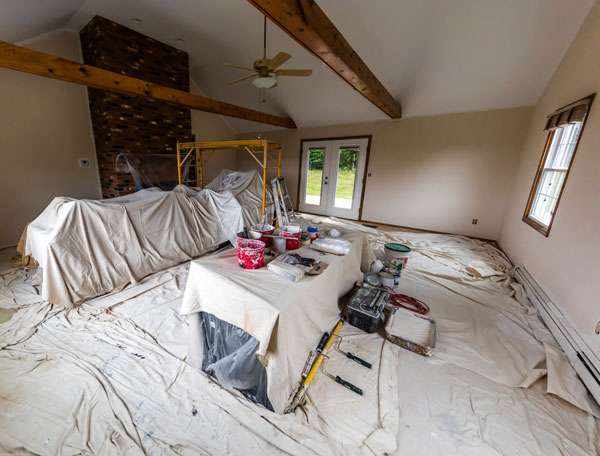
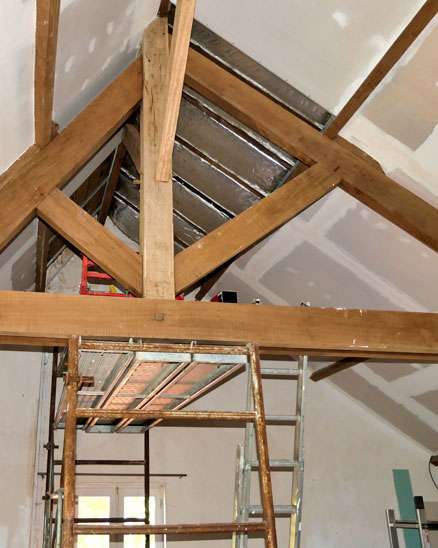
    Painting vaulted ceilings often means working at hazardous heights. Prioritize safety by using a sturdy ladder or scaffolding. Make sure the ladder is stable and set on an even surface before climbing up. If possible, have someone assist you for added safety.
  2. Surface Preparation
    Before you start painting, make sure that your surface is ready to absorb the color. Clean the ceiling thoroughly by removing any dust, debris, and cobwebs. Repair any cracks or imperfections using a suitable filler. Starting with a smooth, clean surface is key for getting a professional finish.

Choosing the Right Ceiling Paint Colors

Before making a big change to your home’s interior, consider your family’s specific needs and goals. Consider these tips before choosing your paint.

  1. Determine Your Goal
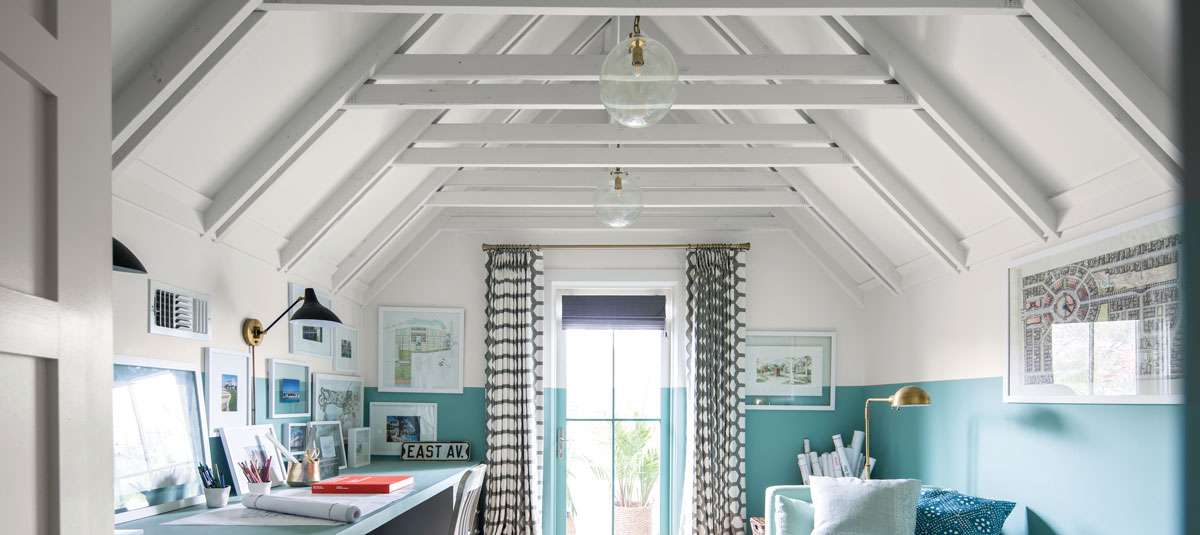
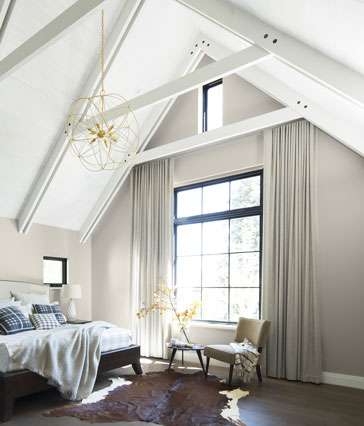
    Vaulted ceilings inherently create a sense of spaciousness. You can enhance this effect by choosing light colors like whites, creams, and soft pastels to reflect light, making the room feel brighter and bigger. 

    On the flip side, if you have particularly tall ceilings and want the space to feel more intimate, consider opting for a darker color to make the ceiling appear lower. 
  2. Consider the Room’s Purpose
    Think about the function of the space when selecting colors. For a cozy bedroom, deep blues or greens might be ideal. In an inviting living room designed for the family to gather, lighter colors like warm gray or silvery blue could be a great choice.
  3. Accentuate Architectural Features
    If your vaulted ceiling features intricate details, consider highlighting them with a contrasting color. This draws attention to the architectural beauty of your space. However, make sure the colors you choose complement the overall theme of the room.

Tips for Painting Vaulted Ceilings

Here are our top tips to ensure a seamless experience painting vaulted ceilings in your home. 

  1. Use the Right Tools
    Invest in quality tools for a smoother painting process. Extension poles for rollers and angled brushes are essential for reaching the tough high points and corners. A paint sprayer can also be helpful for covering large areas without wearing yourself out.
  2. Work From Top to Bottom
    Start at the highest point of the vaulted ceiling and work your way down. This helps to prevent accidental smudges and drips on freshly painted areas. Working top to bottom is a systematic approach that ensures a consistent finish, even if you’re a first-timer!
  3. Apply Primer
    Applying a primer first is crucial, especially if you’re transitioning from a dark to a light color. Primer helps the paint adhere better and ensures that you get the results you want. For the best possible results, this is not a step you’ll want to skip. 
  4. Take Breaks
    Painting a vaulted ceiling is physically demanding, regardless of whether you have painting experience. Take breaks throughout the process to give your arms a break and avoid fatigue. Trying to knock out the whole project all at once pretty much guarantees that you’ll make a mistake. 
  5. Check and Double-Check
    Regular inspection is key. Examine your work as you progress to catch any drips, streaks, or missed spots. Painting corrections are far easier when addressed right away, so keep a close eye on your completed work and inspect it during breaks.

Common Issues With Painting Vaulted Ceilings

As paint professionals, we’ve seen it all. Here are some of the most common issues homeowners face when painting vaulted ceilings. 

  1. Uneven Coverage
    Getting consistent coverage on a vaulted ceiling can be tough. To counter this, make sure your roller is properly loaded with paint and use an extension pole for even strokes.
  2. Drips and Splatters
    Drips and splatters are common, especially when working at heights. Keep a damp cloth handy to wipe away any mistakes right when they occur. For stubborn spots, giving the area a gentle sanding between coats can rectify the issue.
  3. Choosing the Right Finish
    For most ceilings, a flat or matte finish is preferable as it hides imperfections and provides a smooth, glare-free surface. However, semi-gloss can be a good option for certain design preferences. Consider which option works best for you.

What To Do Next

Here’s what to do once you’ve finished painting your vaulted ceilings. 

  1. Allow Ample Drying Time
    Patience is the foundation of a flawless finish. Allow each coat to dry thoroughly before applying the next. Rushing this process can lead to smudges and uneven coverage.
  2. Evaluate the Final Result
    Step back and check out your work once the last coat has dried completely. Look for any touch-ups you might need and ensure that the color is consistent throughout your vaulted ceiling.
  3. Clean Up with Care
    Cleaning up after painting vaulted ceilings involves more than just washing brushes. You’ll also need to remove the painter’s tape with care, ensuring it doesn’t peel off your dried paint. Clean any tools you’ve used right away to prolong their lifespan.

Find Your Ceiling Paint Colors in Maui

Painting vaulted ceilings is tough without the right tools and techniques. However, it can be a rewarding project that brings your home to life. Now that you know how to paint vaulted ceilings, all you have to do is get started. 


As Maui’s premier Benjamin Moore retailer, Da Kine Paints is your go-to source for all things paint-related. Check out our collection of quality paints or stop by the store to meet with our experts and get help choosing the perfect paint color for your vaulted ceilings.

Exploring the Benjamin Moore Paint Color Trends of 2024

Exploring the Benjamin Moore Paint Color Trends of 2024

The world of interior design is ever-evolving and fresh trends always set the stage for creative expression in our homes. Benjamin Moore’s paint color trends 2023 brought an interplay of colors and styles that paved the way for this year’s color of the year. 

For 2024, the trending color palette is inspired by the vibrancy of travel and the magic of unexpected moments. The Benjamin Moore Color Trends of the Year encourages us to play with contrast, blend traditional and modern styles, and celebrate the joy of color in our living spaces.

Today, our paint experts are sharing the 2024 color palette. We’ll also provide insights on how you can incorporate these trending colors into your home. From Hazy Lilac and Teacup Rose to Regent Green and Topaz, here are the color trends to watch.

Blue Nova: The 2024 Color of the Year

Blue Nova (825), the Color of the Year for 2024, captures the essence of limitless possibilities. It’s a beautiful hue that reminds us of endless skies and deep oceans, inviting a sense of calm and tranquility into the home.

With soft, muted undertones, Blue Nova is the perfect canvas for creating spaces that exude sophistication and modernity. This shade of blue, pairs beautifully with a wide range of other colors, allowing for versatile design options. 

Whether you want to create a peaceful retreat in your bedroom or a productive workspace, Blue Nova is an elegant backdrop for any room. 

Exploring the 2024 Color Palette

The Benjamin Moore Color Trends of 2024 are more than just a selection of individual colors. They each come together as a palette that draws from our emotions and experiences. Now, let’s dive into the enchanting colors that make up this year’s collection.

White Dove

White Dove (OC-17) is a classic, timeless shade that epitomizes purity and simplicity. It pairs exceptionally well with Blue Nova, creating a fresh and airy ambiance in the home. You can use it for trim, ceilings, or as the main color in a room to open the space.

Pristine

Pristine (OC-75), as the name suggests, is a crisp white that radiates clarity and serenity. It pairs well with the other 2024 trending paint colors and can be used to create a clean, modern backdrop that allows other shades to pop and leave a lasting impression.

Topaz

Topaz (070) adds a touch of warmth and depth to the paint color trends of 2024. This rich, jewel-toned color is perfect for creating eye-catching accents and focal points in your space. Consider using it for furniture, textiles, or accessories to add a touch of luxury.

Teacup Rose

Teacup Rose (2170-50) is a soft, sophisticated pink that brings a touch of romance to the palette. It pairs beautifully with Blue Nova, creating a delightful contrast. Use this color to infuse a sense of charm and elegance into your interiors.

Honeybee

Honeybee (CSP-950) is a warm, golden hue that exudes energy and vibrancy. It’s an excellent choice for creating a welcoming and cheerful atmosphere in your home. Try using it in areas where you want to infuse a dose of positivity and optimism.

Regent Green

Regent Green (2136-20) is a lush, botanical shade that evokes the tranquility of nature. When paired with Blue Nova, it creates a serene and harmonious environment. Consider using it in bedrooms or living spaces to bring the outdoors inside.

Antique Pewter

Antique Pewter (1560) is a sophisticated gray hue with a touch of nostalgia. This color adds depth and character to your space, making it ideal for creating a sense of timelessness. Consider using it as an accent or for cabinetry to introduce a touch of vintage charm.

Polar Sky

Polar Sky (1674) is a cool, tranquil blue that beautifully complements the paint color trends of 2024. This hue evokes a sense of serenity and relaxation and is perfect for bedrooms, bathrooms, or any space where you hope to find calm.

Hazy Lilac

Hazy Lilac (2116-40) is a soft, ethereal purple that embodies creativity and imagination. It’s a color that invites dreaminess and whimsy into your interiors. Use it for accent walls or as a surprising element in your home decor.

Playing with Contrast and Style

One of the standout features of the Benjamin Moore Color Trends of 2024 is the way it encourages us to blend traditional and modern styles. This year’s palette offers an array of colors that you can combine to create visually stunning interiors. 

You can create decadent spaces by using Topaz and Antique Pewter for a luxurious, timeless feel. If you prefer a more contemporary look, consider blending Polar Sky with White Dove for a clean, crisp aesthetic. The options are truly endless.

Final Thoughts

The Benjamin Moore Color Trends of 2024 invite us to embark on a creative journey that transcends the ordinary. With Blue Nova (825) as our guiding star, we can explore a world of colors that inspire and transform our living spaces. 

This palette offers endless possibilities for self-expression and design innovation. As we embrace the new year’s boundless potential, think about taking design risks, blending shades, and exploring the magic that can be found in unexpected pairings. 

Shop Benjamin Moore Color Trends of 2024 at Da Kine Paints

Whether you choose to create a moody atmosphere or opt for spirited pastel walls, the Benjamin Moore Color Trends of 2024 are your passport to a world of creativity and individuality in interior design. As the premier source of Benjamin Moore paints on Maui, Da Kine Paints is your go-to paint store for this year’s paint color trends.


Visit our ohana for help with your next project or to browse our expansive collection of Benjamin Moore paints. Don’t have time to stop by? Shop your favorite paint colors online to transform your living space today.

What is Low VOC Paint?

What is Low VOC Paint?

Paint companies everywhere are offering low-VOC paint or free of VOC. VOC, or volatile organic compounds, are chemicals that emit gases that can be harmful to people and our environment. But what is low-VOC paint, should you be using it, and is it a game-changer for the eco-friendly movement?

Learn all about low-VOC paint from our Maui experts. Find out how to switch to nontoxic paint with this helpful guide. Stay tuned to learn about the differences between VOC levels, the benefits of eco-friendly paint, and more. 

Understanding Low VOC Paint

VOCs are chemicals that evaporate at room temperature, releasing potentially harmful gases into the air. Traditional paints often contain high levels of VOCs, contributing to indoor air pollution and posing health risks when inhaled over extended periods. Oftentimes, VOCs are used in paint as the medium that allows it to glide smoothly across a surface. After application, the gases can be emitted for weeks or even years. 

Inhaling VOCs can lead to health problems such as nausea, headaches, organ damage, and even issues with your central nervous system. Low VOC paint, on the other hand, contains significantly reduced amounts of these volatile compounds, making it a safer and more eco-friendly choice for your indoor and outdoor painting projects. 

Importance of Low VOC Paint

The shift stems from a growing awareness of indoor air quality and environmental safety. As we spend a considerable amount of time indoors, whether at home or in the office, the air we breathe matters. High VOC levels in traditional paints can lead to long-term health issues, and opting for low-VOC paint minimizes these risks, promoting a healthier environment for you and your family.

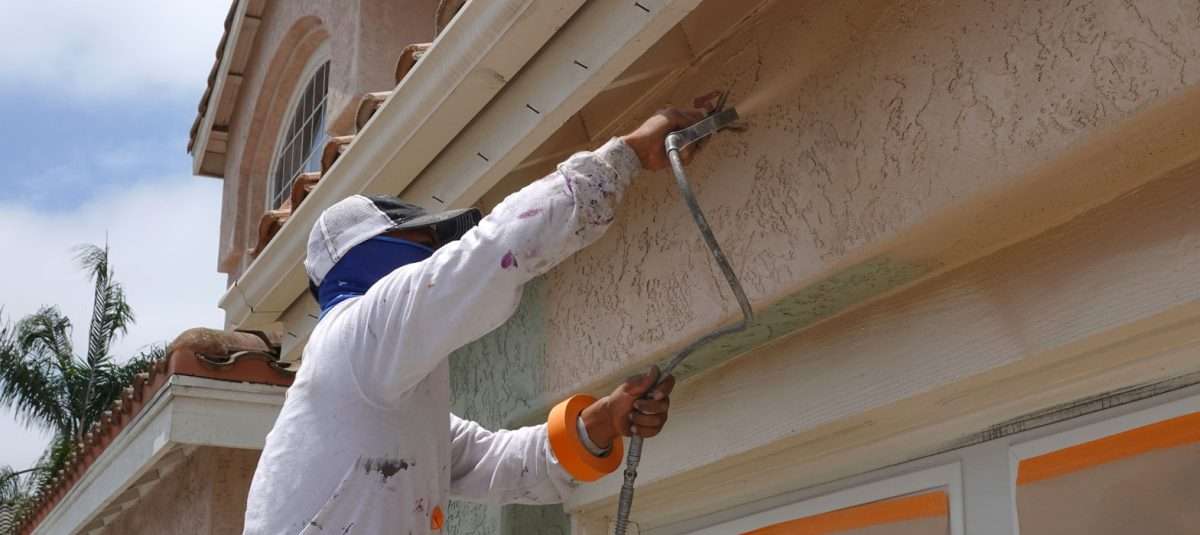
Benefits of Switching to Eco-Friendly Paint

Making the switch to eco-friendly paint can bring several benefits to your health and carbon footprint. Here are some of the key advantages to consider. 

  1. Healthier Indoor Air
    Low VOC paint significantly reduces indoor air pollution, creating a safer space to live or work in and exposing your family to fewer allergy-causing toxins.
  2. Reduced Environmental Impact
    By choosing paints with fewer volatile compounds, you contribute to lower emissions that harm the environment and reduce your carbon footprint. With today’s heightened awareness of environmental issues, many are making the switch to more eco-friendly products – from the cleaning products we use to the paint we coat our homes in.
  3. Less Odor
    You know that “new paint smell” that hits you in the face when you walk into a room that’s just been painted? That’s the smell of volatile organic compounds. Low VOC paints often have minimal to no odor, making the painting process more pleasant and less intrusive to your daily routine.
  4. Durable and High-Quality Finishes
    Brands like Benjamin Moore prioritize both health and quality, offering low VOC paints that maintain durability and high standards of finish. Switching to eco-friendly paint doesn’t have to mean sacrificing quality; it all depends on the brand you choose. 

Tips for Painting with Low-VOC Paint

Ensuring proper ventilation by opening windows and using fans is essential. Thoroughly stirring the paint before application ensures an even distribution of pigments, leading to a smoother finish. Expect that low VOC paint might require additional coats for full coverage, so plan accordingly. 

Investing in high-quality brushes and rollers will contribute to a more seamless application process, allowing you to achieve better results with less work. Lastly, follow guidelines for the safe disposal of leftover paint to minimize the environmental impact.

VOC-Free vs. Low VOC vs. VOC Paint

Paint labeled as “VOC-free” contains little to no volatile organic compounds, offering the lowest emissions and highest eco-friendliness. However, these paints can still contain up to 5 grams of volatile organic compounds per liter, so they aren’t always completely VOC-free, despite what the label says. 

Low VOC paints contain significantly reduced levels of volatile compounds compared to traditional paints, promoting better indoor air quality. To be considered a low-VOC paint, a product must contain less than 50 grams of VOCs per liter. You’ll likely need an extra coat or two to achieve the same finish as a standard VOC paint. 

Traditional VOC paints contain higher levels of volatile compounds, potentially impacting indoor air quality and exposing you to health risks. The average VOC paint can contain anywhere from 250 grams to 380 grams of VOCs per liter, depending on whether you’re working with matte paint or glossy paint. Although these paints are often cheaper and can come out smoother, it’s important to consider the potential health concerns and environmental impact of opting for VOC paint. 

Benjamin Moore’s Non-VOC Paint Collection

Benjamin Moore stands as a testament to quality, transparency, and health-conscious paint solutions. Their non-toxic paint collection boasts stunning interior and exterior paints designed to meet the highest standards of performance while prioritizing environmental responsibility and human health. 

These paints offer a wide range of colors and finishes, ensuring that your space not only looks beautiful but also contributes to a healthier environment for all.

Visit Da Kine Paints in Maui for Your Non-Toxic Paint Needs

At Da Kine Paints, we understand the significance of creating spaces that are both visually appealing and healthy. Our Benjamin Moore non-VOC paint collection embodies the values of quality, sustainability, and well-being. Come visit us and explore our range of eco-friendly paints, designed to transform your space while safeguarding your health and the environment.

Making the switch to low VOC and non-toxic paints isn’t just about aesthetics—it’s a conscious decision to create healthier living and working environments. By choosing eco-friendly paints like those offered at Da Kine Paints, you’re making a statement about your commitment to a greener, healthier future. Transform your space today with Da Kine Paints and Benjamin Moore’s non-toxic paint collection!

How to Repair Peeling Paint

How to Repair Peeling Paint

Living on the beautiful island of Maui comes with its own set of joys and challenges, especially when it comes to maintaining our homes. One common issue that Maui homeowners often encounter, particularly in bathrooms, is the persistent problem of peeling paint. 

When the paint in our homes starts to peel, it can signal underlying issues like moisture, mold, and mildew. Not only that, but it negatively impacts a home’s visual appeal. In this comprehensive guide on how to repair peeling paint, our experts are sharing the steps to recovery and preventive measures to keep your walls looking beautiful in the future.

What Causes Paint to Peel in Maui Homes?

Maui’s unique climate, characterized by high humidity levels and frequent moisture, can wreak havoc on painted surfaces. The combination of moisture, poor ventilation, and low-quality paint often leads to peeling and chipping. Additionally, mold and mildew thrive in moist conditions, which can cause further damage to the paint. 

Tools You’ll Need to Fix Peeling Paint

To embark on your paint restoration journey, you’ll need to gather these essential tools:

  • Safety gear – Protect yourself with gloves, goggles, and a mask.
  • Putty knife – This is essential for scraping off loose or peeling paint.
  • Sandpaper – This smoothens the surface for better paint adhesion.
  • Primer – Primer acts as a foundation for new paint and prevents future peeling.
  • High-quality paint – We recommend opting for the moisture-resistant Benjamin Moore paints available at Da Kine Paints.
  • Paintbrushes or rollers – You’ll need these for applying primer and paint.
  • Mold and mildew cleaner – This is a must for protecting Maui’s moisture-prone bathrooms.

A Step-By-Step Guide

Follow these key steps to repair peeling paint and restore your home’s walls to their former glory.

  1. Prep the Area
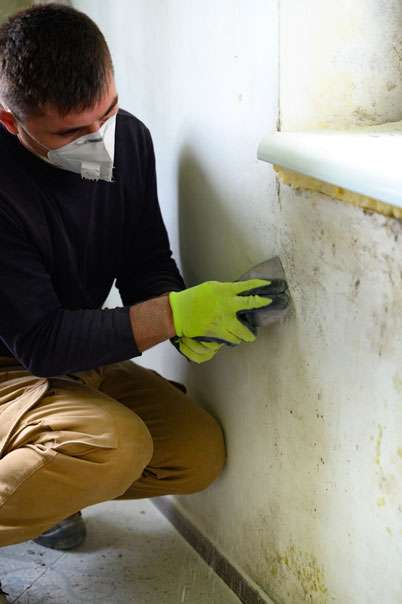
    Your first task in tackling peeling paint is to prepare the affected area. Carefully wield a putty knife to remove any loose or peeling paint, making sure to be gentle to avoid damaging the underlying surface. 

    Once you’ve cleared the loose bits, grab your sandpaper. Gently sand the area to create a smooth surface for the new paint to adhere to. This step is crucial in creating a clean canvas for the restoration process.
  2. Clean the Surface
    Maui’s humid climate often fosters an environment where mold and mildew thrive, especially when it comes to bathroom paint. To combat this, arm yourself with a mold and mildew cleaner specifically designed to tackle these issues. 

    Apply your cleaner to the affected area and scrub away any existing mold or mildew. Rinse the area thoroughly and allow it to dry completely before moving forward. Giving your walls a thorough cleaning sets the stage for a fresh start and prevents future mold and mildew issues from cropping up.
  3. Prime the Surface
    Once the surface is cleaned and dried, it’s time to lay down a foundation for the new paint. This is where the primer comes in—an essential element in ensuring the longevity of your refreshed walls. Apply a coat of primer evenly over the prepared surface. 

    Starting with primer will help the new paint adhere better and act as a protective barrier, preventing future peeling problems. Let the primer dry completely according to the manufacturer’s instructions before proceeding to the next step.
  4. Paint Application
    Now comes the exciting part – adding color back to your walls! Choose a high-quality, moisture-resistant paint like the Benjamin Moore collection available at Da Kine Paints. With brushes or rollers in hand, apply the paint evenly to your primed surface. 

    Take your time to ensure every nook and cranny is covered, and allow each coat to dry thoroughly between applications as recommended by the paint manufacturer.
  5. Finishing Touches
    With the paint applied, it’s time for a final assessment. Carefully inspect the painted area for any missed spots or imperfections. Make touchups as needed to achieve a flawless finish. Allow the final coat of paint to dry completely for the best results and a long-lasting solution to your peeling paint predicament.

Peeling Paint Prevention

After taking the steps to repair peeling paint, the last thing you want is to experience the same issue again in the future. Here are some helpful tips to prevent the recurrence of peeling paint, especially in Maui’s moisture-prone environments.

  1. Enhance Ventilation
    Adequate airflow is vital in preventing moisture buildup; a common culprit behind chipped and peeling paint. Make sure your bathroom is well-ventilated by installing exhaust fans. Consider leaving doors and windows open whenever possible to promote air circulation. This simple step goes a long way in mitigating excessive humidity levels.
  2. Choose Quality Paints
    Invest in high-quality, moisture-resistant paints that are specifically formulated to withstand humid climates. These paints offer superior durability and resistance to moisture, mold, and mildew. Opting for quality paints significantly reduces the likelihood of future paint peeling issues.
  3. Regular Maintenance
    Keep a vigilant eye on your bathroom walls. Periodically inspect for any signs of peeling, discoloration, or mildew growth. Promptly address any emerging issues by spot-treating problem areas before they escalate. A proactive approach to maintenance can nip potential problems in the bud.
  4. Monitor Humidity Levels
    Maui’s climate can be incredibly humid, especially during rainy seasons. Consider using a dehumidifier in areas prone to moisture buildup, such as bathrooms. Maintaining optimal humidity levels helps prevent excessive moisture from accumulating on your walls, reducing the risk of peeling issues in your bathroom paint and other areas.
  5. Proper Surface Preparation
    Before tackling a paint project, always be thorough in your surface preparation. This includes cleaning the surface, removing any existing peeling or damaged paint, and applying a suitable primer before getting started. A well-prepped surface provides a solid foundation for the paint to adhere to, minimizing the chances of future peeling.
  6. Timely Repairs
    Address any leaks or plumbing issues promptly. Even minor leaks can contribute to moisture accumulation behind walls, leading to paint damage. Regularly check for leaks in plumbing fixtures, pipes, and seals, and repair them as soon as you detect an issue.
  7. Regular Cleaning
    Maintain a regular cleaning routine for your bathroom walls. Use mild, non-abrasive cleaners suitable for painted surfaces to remove any dirt or grime. Avoid harsh chemicals that could potentially damage the paint finish.

Shop Moisture-Resistant Paint at Da Kine Paints on Maui

Reviving peeling paint is a breeze with the right tools and techniques. By following these steps and adopting preventive strategies, you can protect your walls for years to come. Visit Da Kine Paints today for personalized recommendations on the best Benjamin Moore paints to revive your Maui home’s walls and keep them looking beautiful.

Painting a Legacy: Michelle Collins, Owner

Painting a Legacy: A Closer look at Michelle Collins, Owner of Da Kine Paints

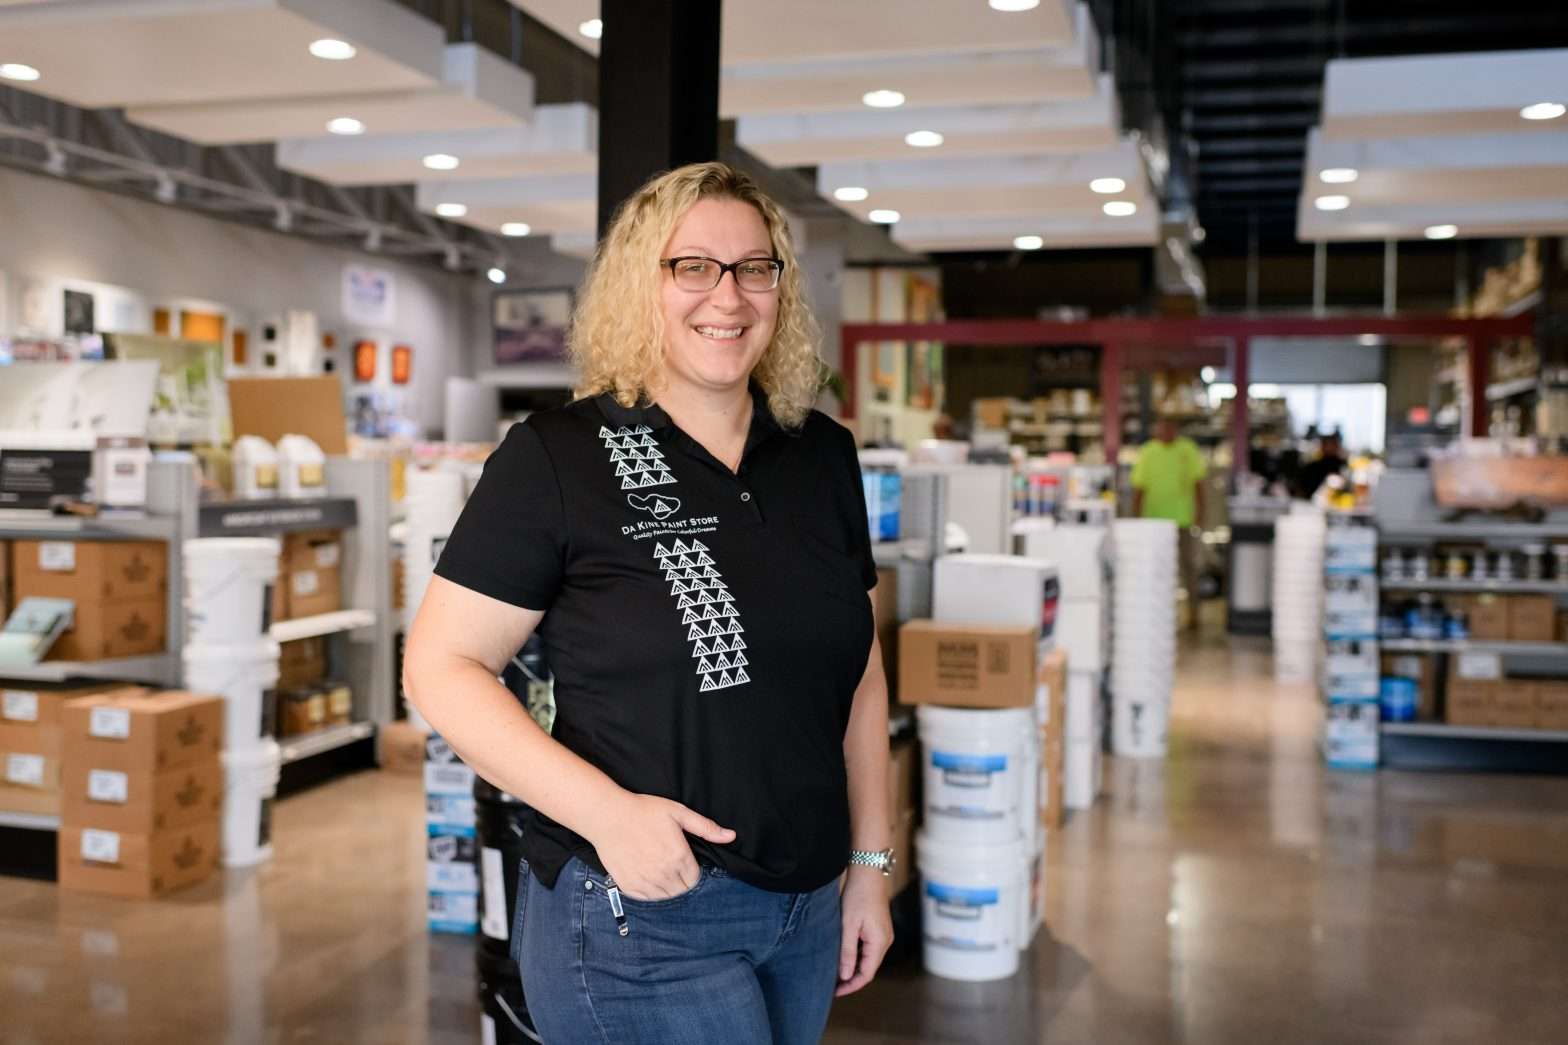
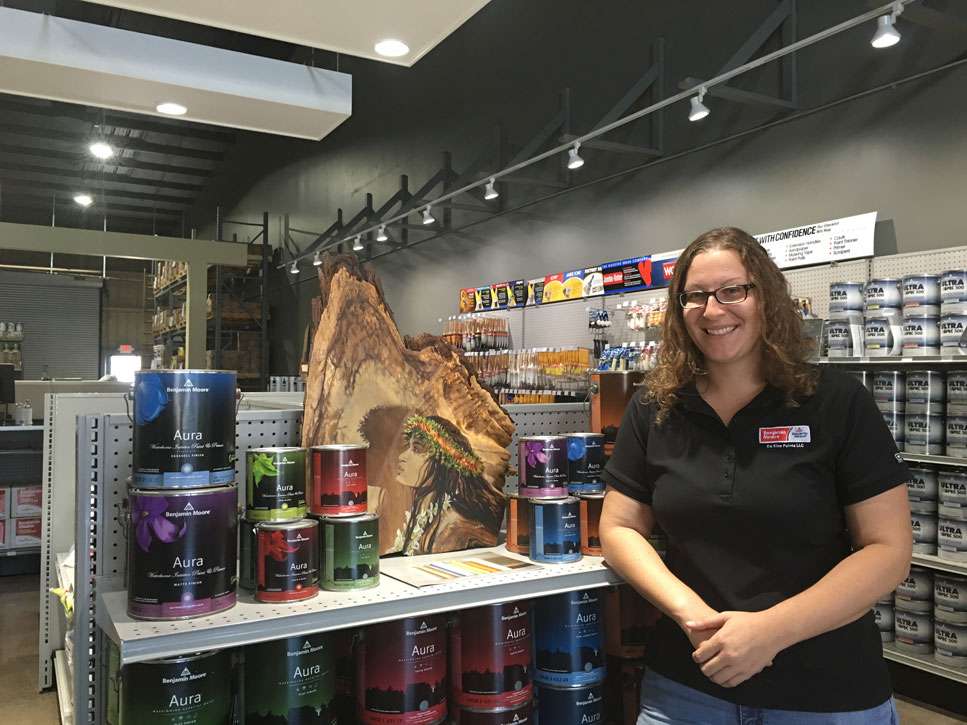
Michelle Collins is the creative force behind Da Kine Paints in Kahului, Maui. Collins went from the Navy to owning the only independent Benjamin Moore Paints store on Maui. Her story is about strength, determination, and success as a business owner.

Today, we are focusing on Michelle Collins and her impact on Maui’s business community as a female business owner.

The Birth of Da Kine Paints

After graduating from the University of Hawaii Maui College in 2015 with a Bachelor of Applied Science degree in applied business and information technology, Michelle wasted no time in opening her store just months after receiving her degree.

When you step into Da Kine Paints on Maui, the vibrant colors and welcoming atmosphere tell a story of passion and dedication. Michelle Collins, the proud owner of this Benjamin Moore Paints store, has turned her love for the industry into a thriving local business right here in Kahului. 

However, Michelle’s journey to becoming a successful business owner wasn’t without challenges. A Navy veteran who served for three years as an information technician, Michelle moved to Maui in 2009 to be closer to her father, Frank. 

The family faced a major setback when the company Frank worked for, Hawaiiana Painting & Maintenance, closed its doors after over two decades in business. Undeterred, Michelle and her father sought guidance from the Maui Business Action Center to open Da Kine Painters, the contracting business, ensuring the continuity of service to the family’s established clientele. In 2015, upon graduating University of Hawaii Maui College, they opened Da Kine Paints, the store.

Navigating Business in a Pandemic

The COVID-19 pandemic posed a unique set of challenges for businesses worldwide. As an essential business, Michelle kept her doors open throughout the pandemic, finding innovative ways to support the community in the process. 

From selling N95 masks and respirators to frontline workers at cost to importing thousands of KN95 masks for those in need, the Da Kine Paints team did what they could to support the health and well-being of their community. With the help of COVID relief funds, Michelle ensured that all existing employees stayed on full-time. Not only that, but she even expanded her team during the pandemic. 

Although her team faced hurdles during the pandemic-induced surge in demand, Collins overcame them through precise material estimates and effective communication with suppliers. Despite the obstacles, she remains optimistic about the future, especially since the trade’s permit-free nature helps to ensure its continued growth.

A Lasting Impact on Maui Construction

Collins’ influence extends beyond the walls of Da Kine Paints. In 2017, she joined the Construction Industry Maui advisory board, later serving as treasurer and eventually becoming the chairperson in 2023. 

Her commitment to the industry, coupled with the inspiration of her father’s legacy, led Collins to obtain her responsible managing employee paint contracting license, solidifying her position as a leader in the local construction community.

In a traditionally male-dominated industry, Michelle Collins stands out as a trailblazer. Overcoming the initial challenge of being a woman in a field dominated by men, Collins found empowerment through the Construction Industry Maui and the National Association of Women in Construction (NAWIC). 

Her involvement with these organizations and the Maui Chamber of Commerce has allowed her to contribute to the development and support of other women in business.

Using Award-Winning Success to Give Back

Da Kine Paints isn’t just a retail store—it’s a community hub. Collins has actively engaged with local developers, contractors, and property managers to ensure Da Kine Paints not only meets but exceeds the expectations of its clients. Beyond providing quality paint products, Michelle has initiated community outreach programs, like sponsoring local events and collaborating with schools on art projects. 

In addition to its community-centric approach, Da Kine Paints has embraced environmental stewardship by implementing green initiatives within its business. Recognizing the impact of the paint industry on the environment, Collins and her team do what they can to minimize their carbon footprint – from promoting eco-friendly paint options to adopting sustainable packaging practices. 

This commitment to sustainability has not only attracted environmentally conscious customers but has positioned Da Kine Paints as a responsible and forward-thinking player in the paint industry. In recognition of her exceptional achievements, Michelle Collins was awarded the title of Exceptional Small Business of the Year in the 2022 Mayor’s Small Business Awards hosted by the Maui Chamber of Commerce. 

Looking Ahead: Michelle Collins’ Vision for Da Kine Paints

As Da Kine Paints continues to flourish under Michelle Collins’ leadership, her vision for the future remains ambitious. Michelle envisions expanding her store’s footprint, both physically and in terms of product offerings. With an eye on technological advancements, she plans to enhance the customer experience through online platforms and virtual consultations. 

Michelle also wants to further contribute to the Maui community by supporting local artists and aspiring painters through workshops and scholarships. Under her guidance, Da Kine Paints seeks to evolve with the times and leave an indelible mark on Maui’s paint industry.

Final Thoughts

Throughout Michelle Collins’ journey as the owner of Da Kine Paints, she has experienced hefty challenges, outstanding achievements, and a strong community connection. Da Kine Paints has proven that it’s more than just a store – it’s a living testament to Michelle’s dedication and unwavering commitment to the people of Maui. 

Michelle Collins’ legacy as a businesswoman, community leader, and advocate is an inspiration to all who know her. While it’s impossible to say what the future of Da Kine Paints looks like, it’s bound to be bright. 

Shop Premium Paints at Da Kine Paints on Maui 

Elevate your painting projects with Da Kine Paints, where quality meets innovation. Whether you’re revitalizing your home, adding a pop of color to your workspace, or engaging in a creative DIY endeavor, our extensive selection of Benjamin Moore Paints promises to bring your vision to life. 

Step into a world of premium quality and personalized service. Visit Da Kine Paints today or shop our extensive online collection of quality paints now.

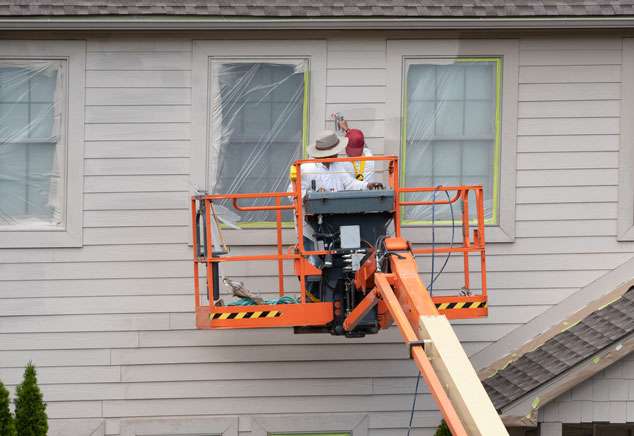
How to Paint Outside in High Humidity

The how to’s of Painting Outdoors in High Humidity

If you would like to revamp the exterior of your home with a few fresh coats of paint, it’s important to understand how environmental factors like heat and humidity play a role. Without knowing the how to’s of painting outdoors in humid weather, your simple paint project can quickly become a nightmare. 

A successful paint job is only possible if the paint has time to dry properly, so a damp surface can seriously impact your results. Luckily, our experts are revealing everything you need to know about how to paint outside in high humidity.

Don’t worry, we’ll try to make this more interesting than watching paint dry—but we can’t promise there won’t be more paint puns. Find out how humidity affects paint, learn our top tips for painting in humid weather, and discover the best paint to use when it’s humid outside.

Can Humidity Damage Painting?

Depending on where you live, the time of year, and the weather outside, the humidity levels in the air can impact the drying ability of paint. While extreme heat can cause paint to dry too quickly, often leading to heat bubbles, high humidity can actually slow down drying so significantly that the paint runs before it can fully dry. 

If your surface was damp when you began painting, this can affect the exterior paint after it’s been applied by encouraging mold and mildew to grow between the wall and your paint. When mold or mildew grows through your paint, you need to thoroughly clean the surface and paint it again—which is the last thing anyone wants to do after sweating through a tough paint job.

Even if you manage to avoid mold and mildew growth, there are other ways that humidity can damage your exterior paint job. For most paints, it’s essential for the water in the paint to evaporate before the solvents do, which is made difficult by humidity. If the water in your paint is unable to properly evaporate, it can cause the paint to thicken into a gel-like consistency and dry in a wavy texture instead of a smooth one. To avoid these issues, it’s best to take precautions before painting outdoors in high humidity. 

Tips for Painting Outdoors in High Humidity

While painting outdoors on a particularly humid day can present challenges, it’s not impossible to get the job done if you know how to work around high humidity. A little humidity in the air is never a bad thing. Actually, you want a little moisture in the air so the paint doesn’t dry too quickly and wind up peeling or cracking. 

A perfect day for exterior painting is generally when the humidity levels are between 40% – 50% relative humidity. If the humidity level is above 85%, it’s best to cut your losses and wait for a better day to paint. However, if the humidity level outside is between 50% – 85%, you can still achieve great results as long as you follow our expert tips for painting outdoors in high humidity. 

#1: Start painting early. 

When you’re painting outdoors, it’s crucial to begin during the early hours of the morning when humidity levels are higher. This might sound counterintuitive, but we do this because as you approach midday, the temperatures rise and the humidity falls. If you time this right, your coats of paint will begin to dry during the time of day when the relative humidity is not as intense, giving you a much better shot at success. 

Once you pass the midday point and get into the late afternoon, the humidity levels rise again and you risk running into issues if you continue to paint. With this in mind, it’s best to finish for the day once you hit the early afternoon. Start early, finish early. If you can avoid letting freshly applied coats of paint dry in direct sunlight, you’ll be even better off.

#2: Keep your layers thin.

Since high humidity causes exterior paint to dry more slowly, it’s a good idea to paint in thin layers. Yes, this will require additional coats of paint, but it will be well worth the effort to ensure long-lasting results that look a million times better because you took the time to do it right. Painting in thin layers is one of the best ways to combat the frustrating effects of humidity, so paint with care and ensure that each coat has ample time to dry. 

#3: Choose the right materials. 

When selecting the materials you need for an outdoor painting project, always take the weather forecast into account. If your painting surface will likely be damp due to the high humidity levels, consider opting for mildew-resistant paint or mixing a mildewcide additive into your paint as a protective measure. 

Are you painting a fire feature like an outdoor fireplace or fire pit? You’ll need specialty paint that has been designed to stand up to extreme heat. Painting a side of your house that gets tons of daily sun exposure? In that case, you should consider opting for fade-resistant paint to maintain your chosen color. The last thing you want after taking the time to paint your front door red is to watch it slowly fade to pink. 

Best Exterior Paint for High Humidity

In the previous section, we mentioned the importance of choosing the right materials when painting outdoors. When looking for a high-quality exterior paint to buy, check the label for terms like “moisture-resistant” or “mildew-resistant.” Because these types of paint have been formulated to hold up in humid conditions, your paint job will be more likely to stay beautiful down the road. 

It’s also important to note that paints with matte finishes absorb moisture, so you’re better off opting for a satin or semi-gloss exterior paint option to deflect moisture instead. Humidity is not something we can control, but it also doesn’t have to derail your painting project. Whether you’re touching up your fence or giving your house a full facelift, it should be smooth sailing as long as you follow these tips on how to paint outside in high humidity and invest in the right materials for the job.

Shop Exterior Paint at Our Maui Paint Store

As your premier source of Benjamin Moore paint in Maui, we offer a vast selection of high-quality exterior paint options to choose from. Visit us in person for a color consultation with our in-store color specialist and get everything you need for your next outdoor paint project. Our knowledgeable and friendly staff can’t wait to serve you!